
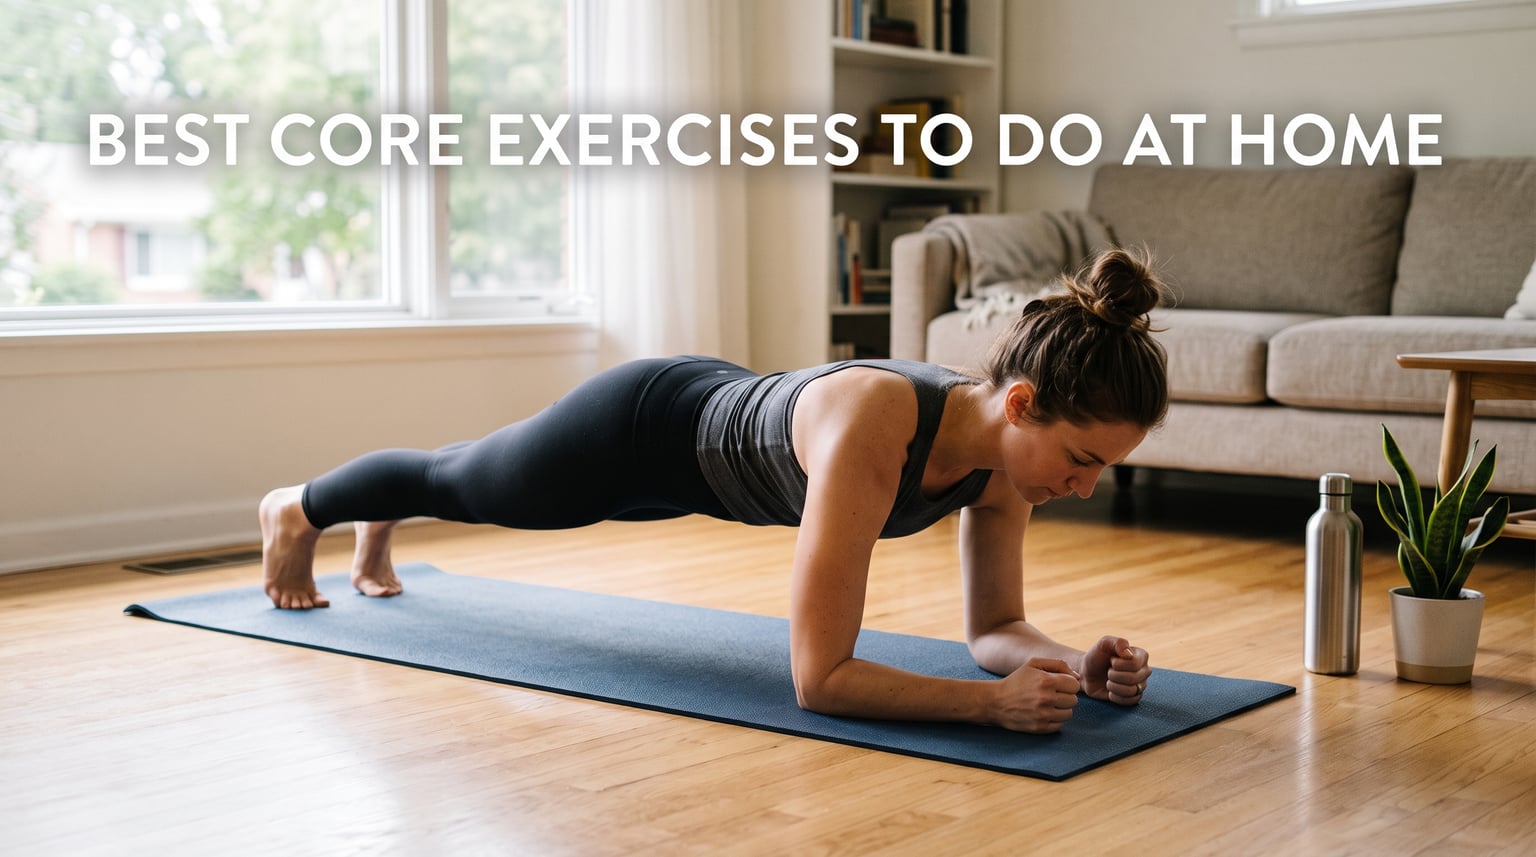
The best core exercises to do at home are the dead bug, the bird dog, and the forearm plank. These three movements need zero equipment, work every layer of your trunk, and are the same patterns I have used with clients who went from chronic back pain to carrying groceries without wincing.
Planking is one of the most effective exercises for the entire core because it forces your transverse abdominis, obliques, and spinal stabilizers to fire together for as long as you hold the position. That is exactly why it shows up in almost every credible list of the best home ab workouts.
In this guide I walk you through what the core actually is, how to brace it correctly, and a full progression from beginner moves to advanced challenges you can do on your living room floor. I also built a 10-minute routine you can repeat daily and added a section specifically for anyone dealing with a stiff lower back or limited mobility.
Everything here is based on movements I have tested myself and coached through with real people, not theory. By the end you will understand exactly which exercises match your current level, how many sets and reps to do, and how to slot them into a weekly schedule that fits a busy life. No fluff, no gimmicks, no equipment required.
Table of Contents
What Are Your Core Muscles and Why Do They Matter
Most people hear the word “core” and picture a six-pack. The six-pack is only one small piece of a much bigger system. Your core is the entire cylinder of muscle wrapping your trunk, front to back, from your ribs down to your pelvis.
It includes the rectus abdominis, which is the visible strip of muscle running down the front of your stomach. On the sides sit the internal and external obliques, the muscles that let you twist and bend laterally. Underneath all of that sits the transverse abdominis, a deep corset-like layer that wraps around your spine like a built-in weight belt.
Behind your spine you find the erector spinae and the multifidus, two groups of muscles that run along your back and keep you upright against gravity. At the bottom of the cylinder sits the pelvic floor, and at the top sits the diaphragm. Together, these muscles form a pressurized canister that stabilizes your spine from every direction.
When all of these muscles work together, they do something simple but powerful: they stabilize your spine so your arms and legs can move with force. That is why a strong core makes lifting a toddler, swinging a golf club, or simply standing up from a low chair feel easier. Your limbs can only produce as much force as your trunk can stabilize.
Research from physical therapy programs repeatedly shows that people with weaker core endurance have higher rates of lower back pain. Training these muscles is not about vanity. It is about giving your spine the support system it needs every time you bend, twist, reach, or lift something heavy.
If you have ever felt your lower back give out before your arms during a lift, that is your core, not your biceps, asking for help. This is why even my friends who strength train seriously still benefit from reading this kind of core strengthening exercises guidance alongside their main lifts.
The other thing to understand is that core training and ab training are not exactly the same thing. Crunches work your rectus abdominis, which is one muscle. True core training hits the front, the sides, the back, and the deep stabilizers together.
That is why this guide is built around movements that resist motion rather than create it. Anti-extension, anti-rotation, and anti-lateral-flexion exercises teach your core to do its real job, which is holding your spine steady while the rest of your body moves.
How to Properly Engage Your Core Before You Start
Before you do a single rep of anything in this guide, you need to know how to brace. I see people do hundreds of crunches with a soft, sagging belly and wonder why they never feel anything working. The brace is the foundation everything else is built on.
Here is the simplest cue I use with new clients. Place your fingers on the sides of your waist, a few inches above your hip bones. Now cough forcefully.
That tightening you feel under your fingers is your transverse abdominis and your obliques firing reflexively. Memorize that sensation. That is what a proper brace feels like from the inside.
Now recreate it without coughing. Imagine someone is about to poke your stomach and you tighten up to brace for it. You should still be able to breathe normally through the tension.
If you are holding your breath and turning red in the face, you are bracing far too hard. Back off to about 30 percent of your maximum effort. That gentle, sustainable brace is what you maintain during every exercise in this guide.
One more cue that helps people who sit at desks all day. Think about drawing your belly button slightly up and in toward your spine, as if you are trying to zip up a tight pair of jeans. Pair that with a gentle squeeze of your glutes and you have a rock-solid brace you can hold for an entire set.
Practice this while standing, while walking, and especially while sitting at your desk. The more familiar the brace becomes, the more automatically your body will fire it during every exercise that follows.
Best Core Exercises to Do at Home for Beginners
These are the movements I start every new client on, regardless of their fitness background. They teach your body how to stabilize the spine before adding load, speed, or complexity. Master these first and every other exercise in this guide gets safer and more effective.
1. The Dead Bug
The dead bug is arguably the single best beginner core exercise because it trains anti-extension. Your job is to keep your lower back glued to the floor while your arms and legs move in opposite directions. It looks easy and feels brutal when done correctly.
Step 1: Lie on your back with your arms reaching toward the ceiling and your knees bent at 90 degrees, shins parallel to the floor. Step 2: Press your lower back flat against the floor and brace gently using the cues from the previous section.
Step 3: Slowly lower your right arm overhead and extend your left leg toward the floor at the same time. Step 4: Stop the moment your lower back tries to lift, then return to the start and switch sides.
Aim for 3 sets of 8 to 10 reps per side. Move slowly, taking about three seconds on the way down and two seconds on the way back up. If your back arches, you have gone too far and need to shorten your range of motion.
The whole point is control, not speed. A client of mine who had been doing 100 sit-ups a day with zero results switched to slow, controlled dead bugs. She felt her abs working for the first time in her life within a single session.
2. The Bird Dog
The bird dog trains anti-rotation and works the entire back side of your core, including the erector spinae and the multifidus. It is one of the “big three” exercises Dr. Stuart McGill recommends for spinal health. It shows up in nearly every credible back rehabilitation program for good reason.
Start on your hands and knees with your wrists under your shoulders and your knees under your hips. Brace your core, then extend your right arm forward and your left leg backward until both are fully straight.
Keep your hips level so a glass of water resting on your lower back would not spill. Hold for two seconds, return slowly, and switch sides.
The biggest mistake I see is hips twisting toward the extended leg. If that happens, shorten your range of motion until you can stay completely stable. Quality beats quantity here every single time.
Work up to 3 sets of 10 reps per side. Once that feels easy, add a two-second pause at full extension. You can also try drawing a small square with your extended hand and foot while holding the position.
3. The Glute Bridge
The bridge looks like a glute exercise, and it is, but it also forces your core to stabilize your pelvis against the movement. It is perfect for anyone who sits all day because it counters the hip tightness that pulls on the lower back and contributes to poor posture.
Lie on your back with your knees bent and your feet flat on the floor, hip-width apart. Drive through your heels and lift your hips until your body forms a straight line from your knees to your shoulders. Squeeze your glutes hard at the top, hold for two seconds, and lower with control.
Do 3 sets of 12 to 15 reps. Keep your ribs down and avoid overarching your back at the top of the movement. Your core should stay braced the entire time, almost as if you are doing a plank lying on your back.
To make this harder, switch to a single-leg glute bridge. Extend one leg straight out at the top of the movement and hold for a few seconds before lowering. The asymmetry forces your core to work overtime to keep your pelvis from dropping to one side.
4. The Supine Toe Tap
This is a gentler cousin of the leg raise. It trains the lower portion of the rectus abdominis without the strain that full leg raises can put on a weak or sensitive lower back.
Lie on your back with your knees bent at 90 degrees, shins parallel to the floor, and your hands resting by your sides. Keeping your lower back pressed flat, slowly lower one foot toward the floor and tap your toe lightly. Bring it back up and switch sides.
If your back lifts off the floor at any point, you have found your current limit. Stay above that point and do not push past it. The moment your back arches, your hip flexors take over and your core stops doing the work.
Do 3 sets of 10 taps per side. Once you can keep your back flat for the entire set, progress to lowering both legs together for a true leg raise.
Intermediate Core Exercises to Build Real Strength
Once the beginner moves feel easy and your back stays rock-steady through every rep, you are ready to add load through leverage. These four movements increase the demand on your core dramatically without needing a single piece of equipment.
1. The Forearm Plank
The plank is the king of isometric core training. It works your entire trunk at once and teaches you to resist gravity, which is exactly what your core does every time you stand, walk, or carry something heavy.
Set up on your forearms and toes with your elbows directly under your shoulders. Squeeze your glutes, brace your core hard, and form a straight line from the back of your head to your heels. Do not let your hips sag toward the floor or pike up toward the ceiling.
Start with 3 holds of 20 to 30 seconds. Build up to 60-second holds before moving to harder variations. A 30-second plank with a perfectly flat, braced body beats a 2-minute plank with sagging hips every single time.
Once you can hold a clean plank for 60 seconds, make it harder instead of longer. Try lifting one foot a few inches off the floor, or reaching one arm forward, or moving your elbows slightly farther forward to increase the lever. Time under tension matters less than tension itself.
2. The Side Plank
Side planks hit the obliques and the quadratus lumborum, the deep side-back muscles that keep you from flopping sideways when you carry something heavy on one shoulder. They are one of the most underdone and undervalued core exercises I know.
Lie on your side with your forearm on the floor, elbow stacked directly under your shoulder, and your legs stacked on top of each other. Lift your hips so your body forms a straight line from your head to your feet. Hold for time, then switch sides.
Most people find their weak side gives out significantly faster than their strong side. Always start with your weaker side and match the hold time on the stronger side. This prevents the strength gap from widening over time.
Aim for 3 sets of 20 to 40 seconds per side. To progress, lift your top leg toward the ceiling while holding the position. You can also transition into a threaded side plank where you rotate your top arm down and under your torso.
3. The Russian Twist
This is where you train rotation, a movement pattern the beginner exercises do not cover. Sit on the floor with your knees bent and your feet flat. Lean back slightly until you feel your core engage.
From there, lift your feet off the floor if you can. Clasp your hands together and rotate your torso to tap the floor on each side. If your feet stay on the floor, the move is much easier, so lift them to make it dramatically harder.
Keep your back long and tall, not rounded forward. The rotation should come from your torso, not from waving your arms side to side. Move with control and pause briefly at each side.
Do 3 sets of 12 to 15 reps per side. Sloppy, fast twists are exactly how people tweak their backs, so slow down until you feel the obliques doing the work rather than momentum carrying you through.
4. The Bicycle Crunch
The bicycle crunch consistently ranks near the top in electromyography studies for total abdominal muscle activation. It hits the rectus abdominis and the obliques at the same time, which is rare for a bodyweight movement.
Lie on your back, bring your knees to a 90-degree angle, and place your hands lightly behind your head without interlocking your fingers. Crunch your right elbow toward your left knee while extending your right leg straight out in front of you. Switch sides in a slow, controlled pedaling motion.
Do 3 sets of 12 to 15 reps per side. Pull your belly button down toward the floor the entire time so you are not just flopping your limbs around. The slower you go, the more muscle you recruit.
Advanced Core Exercises for a Serious Challenge
These movements demand serious stability, strength, and body awareness. Do not rush into them just because they look impressive. If your back hurts during any of them, drop back a level and rebuild your foundation.
1. The Hollow Body Hold
This is a gymnastics staple for a reason. It builds the kind of total-body tension that transfers to every other exercise you do, from pull-ups to heavy squats. A gymnast who can hold a perfect hollow body for 60 seconds has a stronger core than most people will ever develop.
Lie on your back and press your lower back flat into the floor. Lift your straight legs and your shoulders off the ground simultaneously, reaching your arms long beside your ears. Your body should look like a shallow banana, with your lower back never leaving the floor.
Start with 3 holds of 15 to 20 seconds. If your back arches, raise your legs higher or bend your knees slightly until you can hold the position clean. Over time, lower your legs and extend your reach to increase the difficulty.
2. Mountain Climbers
Mountain climbers add speed and cardio to your core work. They train anti-rotation under movement, which is exactly what your core does when you run, hike on uneven ground, or change direction quickly in any sport.
Start in a high plank position with your hands directly under your shoulders. Drive one knee toward your chest, then quickly switch legs as if you are running in place horizontally. Keep your hips low and your core braced hard the entire time.
Do 3 sets of 30 to 45 seconds. The instant your hips start piking up toward the ceiling, slow down. Form before speed, always, because sloppy mountain climbers are just hip flexor work with a sore lower back as a bonus.
3. The Dragon Flag Progression
This is the famous Bruce Lee exercise, and it is one of the hardest bodyweight core moves you can possibly do. It requires serious plank strength and total-body tension before you even attempt it.
Lie on your back and hold onto something sturdy behind your head, like a bench or the base of a heavy couch. Drive your legs straight up toward the ceiling so your body forms a vertical line from shoulders to feet.
Slowly lower your entire body, keeping it rigid as a board, until you are a few inches off the floor. Press back up without bending at the hips. If you cannot do a full rep, start with negatives only, lowering yourself slowly over five seconds before resetting.
Even one or two slow negatives per set will build incredible strength over a few weeks. Another useful progression is the tuck dragon flag, where you bend your knees and tuck them toward your chest to shorten the lever and make the movement more manageable.
A 10-Minute No-Equipment Core Routine You Can Do Daily
I built this routine for people who tell me they have no time for ab work. You can do it before your morning shower, during a lunch break, or while the coffee brews. It requires nothing but a patch of floor.
Do each exercise for 40 seconds, then rest for 20 seconds. Move straight into the next exercise without extended breaks. That is one complete round.
Rest one full minute between rounds and aim to complete two to three rounds total. Round one starts with the dead bug, then moves into the bird dog, forearm plank, glute bridge, and bicycle crunch. That single round covers flexion, extension, rotation, and anti-rotation in under five minutes.
If you have more time and want a second round, swap in the Russian twist, the side plank (hold for the full 40 seconds on each side), and the mountain climber. That pushes your total time to about 10 minutes and ensures you hit every angle of the core across both rounds.
Three to four sessions a week of this routine is enough to notice a real difference in how stable you feel during daily activities within three to four weeks. Clients regularly tell me their lower back feels better, their posture improves at their desk, and their squats and deadlifts suddenly feel more controlled.
Consistency beats intensity every time. Showing up for 10 focused minutes daily will outperform a sporadic 45-minute ab session done once a week. The core responds to frequency more than to volume, because it is built for endurance rather than peak force.
One simple way to stay consistent is to anchor the routine to something you already do every day. Do it right after you brush your teeth, or immediately before you start work in the morning. Habits stick when they are tied to existing routines.
Core Exercises for Seniors and People With Lower Back Pain
Not every core exercise works for every body. If you are older, recovering from an injury, or dealing with chronic back stiffness, you need a more conservative approach that respects what your spine can handle today.
The bird dog, the glute bridge, and the dead bug are your best friends here. All three keep your spine in a neutral position and train stability without the repeated flexion that can aggravate a sensitive back. These are not “easy” exercises when done correctly.
The McGill “big three,” which consists of the bird dog, the side plank, and a modified curl-up performed from the floor, were literally designed for this population. Dr. Stuart McGill spent decades studying spine biomechanics and built this trio to maximize core endurance while minimizing spinal load.
Skip the Russian twist, the bicycle crunch, and any rapid twisting movement until your base stability is rock solid. Repeated spinal flexion and rotation are the two patterns most likely to irritate a disc, so we earn the right to do them with months of foundational work first.
For seniors who have trouble getting down to the floor, I also love standing march variations. Simply stand tall, brace your core, and lift one knee to hip height. Hold for two seconds, lower slowly, and switch.
It builds balance and core stability simultaneously, which matters far more than crunches for fall prevention. Another excellent option is the standing side bend with controlled breathing. Stand with your feet shoulder-width apart, raise one arm overhead, and gently lean toward the opposite side.
If any movement causes sharp pain, stop immediately. Muscle soreness that feels like a dull ache is fine and expected. Sharp, electrical, shooting, or radiating pain is not, so check with a physical therapist before pushing through discomfort.
Safety Tips and Common Mistakes to Avoid
Even great exercises can cause harm when done poorly. Here are the most common mistakes I see in person and online, and exactly how to fix each one.
Mistake number one is letting the lower back arch during planks, leg raises, or hollow holds. If your back sags, your core has disengaged and your spine is taking the load it should not be taking. Fix it by squeezing your glutes hard, tucking your pelvis slightly, and shortening your range of motion until you can hold a neutral spine.
Mistake number two is pulling on the neck during crunches and bicycle crunches. Your hands should barely rest behind your head, not interlocked and yanking. If you find yourself pulling, cross your arms over your chest instead, because your abs should curl your torso up, not your arms.
Mistake number three is holding your breath during bracing. A proper brace lets you breathe in short, rhythmic puffs. If you are turning purple and holding your breath for an entire set, you are creating excessive pressure and missing the point of the exercise.
Mistake number four is chasing reps over quality. Ten perfect dead bugs will build more strength than 50 sloppy ones done with a sagging back. I would rather see you do fewer reps with flawless form than grind out garbage volume that reinforces bad movement patterns.
Mistake number five is doing core work every single day at maximum intensity. The core can handle frequent training, but it still needs recovery. Build in at least two lighter days per week where you either rest entirely or stick to gentle mobility work.
Mistake number six is ignoring the back side of the core. People love crunches and planks but forget that the erector spinae and the multifidus need attention too. Always balance front-focused exercises with back-focused movements like the bird dog and the glute bridge.
Frequently Asked Questions
What is the most effective core exercise at home?
The forearm plank is the most effective core exercise to do at home because it engages your entire trunk at once, requires no equipment, and builds the isometric strength your spine needs for daily stability. Pair it with the dead bug and the bird dog for a complete routine.
What are the big 3 exercises for the core?
The big 3 core exercises, popularized by spine researcher Dr. Stuart McGill, are the bird dog, the side plank, and the modified curl-up. Together they build stability, endurance, and spinal resilience while minimizing the repeated flexion that can stress the lower back.
Is 20 minutes of core enough?
Yes, 20 minutes of focused core work is more than enough for most people. Two to three rounds of a well-designed 6 to 8 minute circuit, done three to four times a week, will build noticeable strength and stability without overtraining.
What are the top 3 core exercises?
The top 3 core exercises for most people are the dead bug, the bird dog, and the forearm plank. They cover anti-extension, anti-rotation, and total trunk stability, and none of them require any equipment.
Is 10 minutes of core a day enough?
Ten minutes of core work per day is absolutely enough if you are consistent. Daily short sessions build endurance and habit faster than one long weekly session, and research shows core muscles respond well to frequent, moderate training.
How often should I train my core at home?
Most people do well training the core 3 to 5 times per week. Because core muscles are primarily endurance-based, they recover quickly and tolerate frequent sessions better than larger muscle groups. Start with 3 sessions weekly and add a day as your strength improves.
Build Your Strongest Core Starting Today
The best core exercises to do at home are not complicated, and they do not require a gym membership, an app, or a single piece of equipment. The dead bug, the bird dog, the forearm plank, and a handful of smart progressions are enough to build a core that supports your spine, improves your posture, and makes everyday movement feel effortless.
Pick three to five movements from this guide that match your current level, set a timer for 10 minutes, and commit to doing them three to four times this week. Track your holds and reps so you can see yourself progressing, even when the day-to-day changes feel small.
The exercises only work if you actually do them, so start small and let consistency do the heavy lifting. Your back, your posture, and your future self will all thank you.