
I thought I was doing lunges correctly for years. My knees ached after every leg session, my balance was all over the place, and I never felt the burn where I was supposed to. It wasn’t until a trainer watched me for about 30 seconds that she spotted three separate form problems — all fixable in under five minutes.
Learning how to do lunges with proper form is one of the most valuable things you can do for your lower body training. A lunge done well builds real, functional strength. A lunge done poorly is a reliable path to knee pain and frustration.
In this guide I’ll walk you through the exact steps for perfect lunge technique, the muscles you’re targeting, the mistakes I see most often (and how to fix them), plus every major variation you’ll want to know. Whether you’re completely new to lunges or trying to figure out why yours feel awkward, this covers everything. For those also working on overall lower body strength, check out our article on proper lunge form for better leg strength as part of a broader training plan.
Table of Contents
What Is a Lunge (and Why Does Form Matter So Much)?
A lunge is a unilateral lower body exercise — meaning you work one leg at a time — where you step out and lower your hips until both knees reach roughly 90-degree angles. That single-leg demand is what makes it so effective and so technical at the same time.
Because each leg handles the load independently, your body can’t rely on the stronger side to compensate. That’s great news for fixing muscle imbalances, but it also means your form has to be right or you’ll put uneven stress on your joints.
When form breaks down, the weight shifts to places it shouldn’t go — the front of the knee, the lower back, the hip flexors. When form is solid, your quads, glutes, and hamstrings do exactly the work they’re designed to do. That’s the difference between a lunge that builds you up and one that grinds you down.
Muscles Worked During Lunges
Lunges work your quadriceps as the primary muscle group — the four muscles at the front of your thigh take on most of the load during the descent and drive phase. That’s why your quads burn after a good set, even without any added weight.
Your glutes and hamstrings work hard as secondary muscles, particularly during the push-back-to-standing phase. The deeper you lower your hips and the more you drive through your front heel, the more glute activation you get.
Supporting muscles include:
Calves — stabilize the ankle and help control the descent
Core — your abs and lower back keep your torso upright and prevent side-to-side wobbling
Adductors — the inner thigh muscles stabilize the hip throughout the movement
Erector spinae — the muscles running along your spine work to keep your back neutral
This is why lunges are considered a compound exercise. You’re not just working legs — you’re training the entire lower body kinetic chain, plus getting meaningful core work with every single rep.
How to Do Lunges With Proper Form
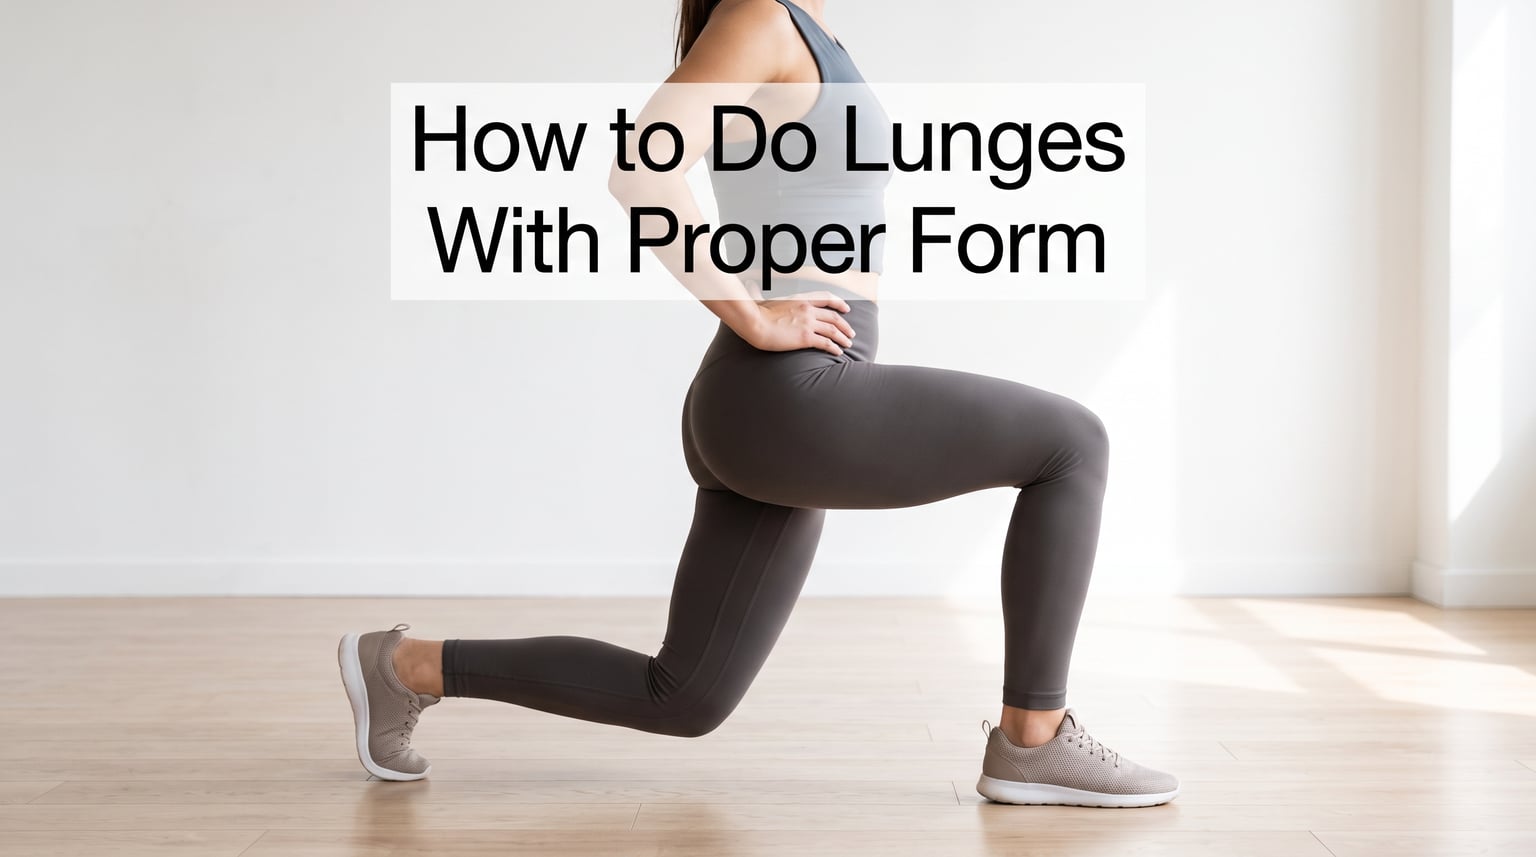
To do lunges with proper form, start by standing tall with your feet hip-width apart, core engaged, and your gaze forward. Follow these steps for each rep:
Set your starting position. Stand with feet hip-width apart, shoulders stacked directly over your hips. Let your arms hang naturally at your sides or place hands on hips. Engage your core like you’re bracing for a light punch to the stomach.
Step one foot forward. Take a controlled step forward with one foot, landing roughly 2 to 3 feet ahead of your back foot. The exact distance depends on your height — taller people need a longer step. If your step is too short, your front knee will shoot far past your toes. If it’s too long, you’ll feel a deep strain in your hip flexor.
Lower your hips straight down. Bend both knees simultaneously, lowering your body straight down toward the floor. This is not a forward lean — think of descending vertically, not pitching forward.
Check your 90-degree angles. At the bottom of the movement, both knees should form approximately 90-degree angles. Your front shin should be roughly vertical (or only slightly angled forward). Your back knee should hover just above — or lightly touch — the ground.
Keep your torso upright. Your chest stays lifted, shoulders back and down, and spine in a neutral position. If you find yourself hunching forward, your core isn’t braced enough or your step length is off.
Drive back up through your front heel. Press firmly through the heel of your front foot to push yourself back to the starting position. This heel drive is what activates the glutes — it’s not a push from your toes. Return both feet to hip-width and repeat on the other side.
For a standard set, aim for 8 to 12 reps per leg. Rest 60 to 90 seconds between sets. Three sets is a good starting point for most people.
Key Form Cues to Remember
The single most important cue is keeping your front knee tracking directly over your second toe — not caving inward, not flaring out. If your knee collapses inward, that’s a red flag worth stopping to fix immediately.
Your torso should stay nearly vertical throughout the entire movement. Leaning forward even slightly shifts the load off your glutes and onto your lower back. A useful mental image: pretend you’re holding a glass of water on your head. You shouldn’t spill a drop.
The heel of your back foot lifts naturally as you lower. That’s normal and expected. But your back knee should not slam into the floor — lower with control so it hovers just above the ground or touches lightly. Weight stays in the front heel at all times during the descent and the drive back up.
Common Lunge Mistakes and How to Fix Them
The most common lunge mistake is letting the front knee cave inward. This is called valgus collapse, and it puts significant shear stress on the knee joint. The fix is to actively press your front knee outward toward your pinky toe throughout the rep — think of spreading the floor apart with your feet.
Leaning too far forward. If your chest drops toward your front thigh, you’re putting your lower back under unnecessary load and taking the glutes out of the movement. Tighten your core before you step, and keep your gaze on a point straight ahead of you at eye level. A tall torso is non-negotiable.
Front knee traveling too far past the toes. Some forward travel of the knee is fine and normal. But if your knee is dramatically overshooting your foot, it’s a sign your step length is too short. Lengthen your stride until your front shin is closer to vertical at the bottom position.
Step that’s too narrow. Many beginners land their front foot directly in front of their back foot, like walking a tightrope. This kills your stability. Your feet should stay hip-width apart laterally — think of two parallel train tracks, not one rail. That lateral separation gives you a stable base.
Looking down at the floor. It seems minor, but dropping your gaze causes your head to dip, which rounds your upper back and shifts your weight forward. Keep your chin up and eyes looking at a point directly in front of you. Your posture will follow.
Rushing through reps. Fast, sloppy lunges are less effective and more risky than slow, controlled ones. The descent should take 2 to 3 seconds. The drive back up can be more powerful, but the lowering phase should always be deliberate.
Lunge Variations to Add to Your Routine
Once you’ve built confidence with the standard forward lunge, these variations let you target muscles differently, add training variety, and progress your challenge over time.
Reverse Lunge
The reverse lunge is what I recommend most people start with, and fitness communities widely agree. Instead of stepping forward, you step one foot backward and lower your back knee toward the floor. The starting foot stays planted the entire time.
This variation puts less shear force on the front knee, which makes it significantly more comfortable if you’ve had knee issues. Because the front foot never leaves the ground, you also have a more stable base — balance is much easier to maintain than in the forward lunge.
The form cues are nearly identical: front knee tracks over toes, torso stays upright, both knees reach 90-degree angles. Drive through the front heel to return to standing. To do the reverse lunge, stand tall, step one foot back about 2 to 3 feet, lower your hips, then push back up and bring the back foot forward to meet the front.
Walking Lunge
Walking lunges take the forward lunge and string reps together continuously as you travel across a space. Instead of returning your front foot to the starting position, you bring your back foot forward to meet it, then immediately step out with the other leg.
The challenge is that you have to nail your step distance every single rep — there’s no pause to reset. This is why Reddit fitness communities note that walking lunges require a lot of practice to make consistent. Start in place until your form is automatic, then try moving versions.
Walking lunges are excellent for building cardiovascular endurance alongside leg strength, and they translate directly to athletic movements like sprinting and jumping. They also make great use of limited gym space — just walk to a wall and walk back.
Lateral Lunge
The lateral (side) lunge moves you to the side rather than forward or back. Step one foot out to the side, shift your weight onto that leg, bend that knee, and lower your hips while keeping the opposite leg straight. Push off through the heel of the bent leg to return to center.
This variation specifically targets your inner thighs (adductors) and outer glutes in ways the standard lunge doesn’t reach. It also develops hip mobility and lateral stability — qualities that are genuinely useful for sports and everyday movement.
Keep your toes pointing forward (or very slightly out), your chest up, and your extended leg straight throughout the movement. The lateral lunge is a great addition to any leg day that already includes forward or reverse lunges.
Lunges and Knee Pain: What You Need to Know
Knee pain during lunges is often a sign of incorrect form rather than an inherent problem with the exercise. The most frequent cause is the front knee caving inward under load — that valgus collapse creates unhealthy stress on the joint. Fixing that alone resolves the pain for many people.
Other causes include a step that’s too short (knee shoots past the toes), a torso that leans forward (compressing the front knee), or weak glutes that can’t stabilize the hip properly. Address the form cue first before concluding that lunges just aren’t for you.
If forward lunges consistently cause discomfort even with corrected form, try switching to reverse lunges for 4 to 6 weeks. The mechanics are gentler on the knee joint, and most people find they can do high-quality reverse lunges pain-free. Once your strength and hip mobility build up, you can try forward lunges again.
If knee pain is sharp, sudden, or swells after exercise, stop the movement and talk to a sports medicine doctor or physiotherapist. Persistent knee pain is worth a proper assessment — don’t train through joint pain that doesn’t resolve with form corrections.
Beginner Tips to Build Confidence With Lunges
If lunges feel unstable or confusing, you’re not alone. The Reddit fitness community frequently points out that lunges have a steeper learning curve than squats for most beginners — and that’s completely normal.
Start by mastering bodyweight squats first. Squats teach you the hip hinge pattern, core bracing, and knee tracking before you have to coordinate the single-leg challenge of a lunge. Two to four weeks of solid squat practice makes the transition to lunges noticeably smoother.
Use a wall or the back of a chair for your first week of lunges. Touch it lightly with one hand for balance support. This lets you focus entirely on the form cues without fighting your balance at the same time. Wean yourself off the support gradually over the following week.
Shorten your step if you’re struggling. A shorter lunge is still a lunge, and it’s far better than a long, sloppy one. As your hip flexibility and muscle strength improve, your comfortable step length will naturally increase.
Do not add weight until you can do 10 reps per leg with consistent, controlled form and no knee pain. Once bodyweight lunges feel easy and automatic, add light dumbbells — start with 5 to 10 pounds in each hand. The jump from bodyweight to weighted should feel like a modest step up, not a dramatic challenge. This is what fitness communities consistently agree on: form before weight, always.
Benefits of Lunges Beyond Leg Strength
Lunges build lower body strength, yes — but the benefits go well beyond that. Because each leg works independently, lunges are one of the best exercises for correcting muscle imbalances between your left and right side. That matters for anyone who sits at a desk, plays sport, or has noticed one leg feeling significantly stronger than the other.
The balance and stability demands of a lunge train your proprioception — your body’s sense of where it is in space. This translates directly to better coordination, reduced injury risk in everyday movement, and improved athletic performance across almost any sport.
Regular lunge work also improves hip flexor flexibility and ankle mobility, two areas that tighten significantly from prolonged sitting. The deep range of motion involved in a full lunge maintains and improves flexibility in ways that most leg machines simply don’t.
From a functional fitness standpoint, the lunge pattern mirrors what you do every time you climb stairs, step off a curb, or pick something up from the floor. Building strength in this movement pattern makes real life easier and safer — that’s the long-term payoff that makes lunges worth getting right.
Frequently Asked Questions
How do I know if I’m doing lunges correctly?
You’re doing lunges correctly if your front knee tracks over your second toe (not caving inward), both knees reach approximately 90-degree angles at the bottom, your torso stays upright throughout, and you feel the work in your quads and glutes rather than your lower back or the front of your knee. If your knee is aching or your back is rounding, those are clear signs to pause and check your form.
Should your knee touch the ground in a lunge?
Your back knee should lower to just above the ground — hovering an inch or so above the floor — or it can touch lightly with no real weight on it. There’s no need to slam the knee into the floor, and doing so can cause bruising or irritate the kneecap. Controlled descent is what matters, not whether you actually make contact.
What is the most effective form of lunges?
For most people, the reverse lunge is the most effective starting point because it puts less stress on the front knee and is easier to control. For overall lower body development, combining the forward lunge with the reverse lunge and lateral lunge covers quads, glutes, hamstrings, and adductors from multiple angles. There isn’t a single best variation — the most effective lunge is the one you can perform with consistent, correct form.
Why can’t I do lunges properly?
The most common reasons lunges feel wrong are poor hip mobility, weak glutes that can’t stabilize the hip, a step length that’s off, or not enough core engagement to keep the torso upright. Start with reverse lunges and use a wall for balance support. Practicing bodyweight squats for a few weeks before attempting lunges also helps — squats teach the fundamental movement patterns that make lunges much easier to learn.
Final Thoughts
Learning how to do lunges with proper form takes a bit of patience upfront, but the payoff is an exercise you can use for years without beating up your joints. The basics come down to a stable stance, both knees at 90-degree angles, a tall torso, and that heel drive on the way back up.
Start bodyweight, move slowly, and don’t rush to add weight or move to harder variations. Master the standard forward lunge or reverse lunge first — everything else follows from there.
Once your form clicks, lunges become one of the most rewarding exercises you can do. Your legs get stronger, your balance improves, and the movement starts to feel natural rather than awkward. That’s when you’ll actually want to do them — and that’s the goal in 2026.